
- Index
- Binding
- Language
- Publisher
- Broadfoot (11)
- Bunce & Huntington (10)
- Charles L. Webster (10)
- Easton Press (110)
- Harper & Brothers (10)
- J H Moore & Company (6)
- Jones & Stanley (7)
- L. Stebbins (10)
- Lee And Shepard (5)
- Macmillan (6)
- Marvel Comics (9)
- Morningside (19)
- Random House (18)
- Roberts Brothers (6)
- Sherman Publishing (8)
- The State Company (6)
- Time Life (10)
- Time Life Books (86)
- Time-life Books (10)
- Unknown (15)
- Other (2020)
- Subject
- American (2)
- American History (11)
- Americana (48)
- Art & Photography (4)
- Bible (14)
- Books On Collecting (3)
- Children's (2)
- Civil War (49)
- Congressional Record (3)
- Gettysburg Cemetery (2)
- History (315)
- Illustrated (7)
- Law & Government (11)
- Literature & Fiction (68)
- Military & War (746)
- Military History (3)
- Poetry (2)
- Reference (10)
- Scarlett O Hara (2)
- Science & Medicine (8)
- Other (1082)
- Theme
- Year Printed
1888 CIVIL War Battles Antique Military History U. S. America Union Confederate


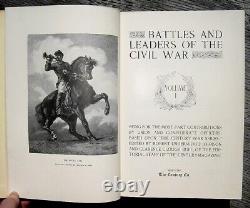
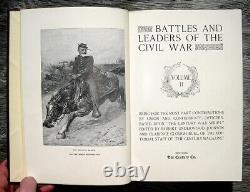
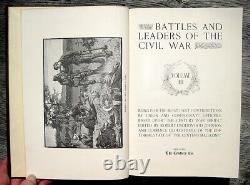
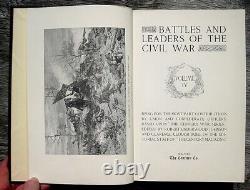
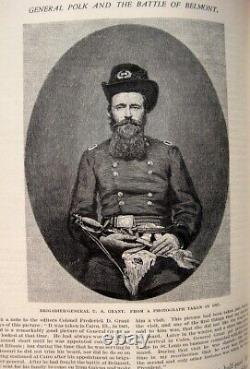
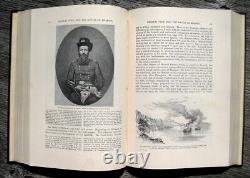

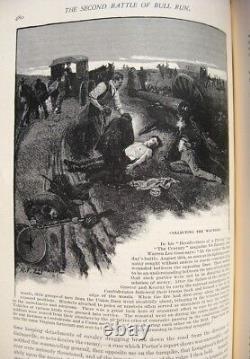
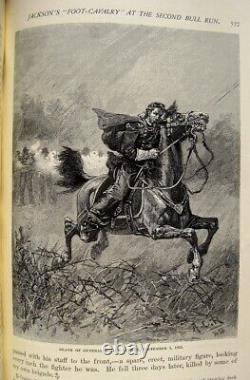
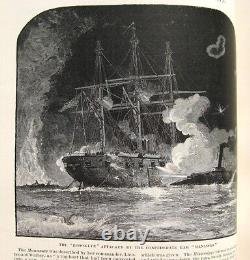
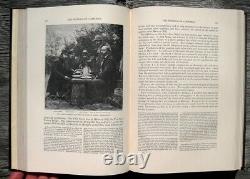


BATTLES AND LEADERS OF THE CIVIL WAR. Being for the Most Part Contributions by Union and Confederate Officers Based Upon The Century War Series. " Edited by Robert Underwood Johnson and Clarence Clough Buel, of the Editorial Staff of "The Century Magazine. Published in 1887 by the Century Company, New York.
11" x 8" three-quarter leather bindings. Illustrated with engravings, facsimiles of photographs and reproductions of paintings, prints, etc. Volume I = 750 pages.
Volume II = 760 pages. Volume III = 752 pages Volume IV = 846 pages. Condition: VERY GOOD ANTIQUE CONDITION. Exteriors as shown in photos.
Text is clean and complete. No torn, loose or missing pages. A beautiful example of this rare four-volume Civil War set.
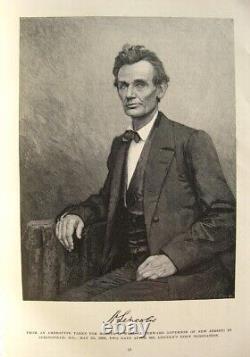
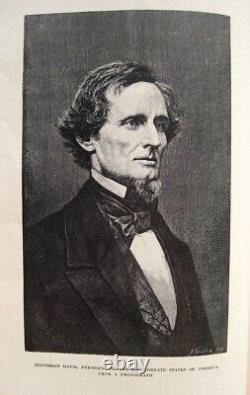
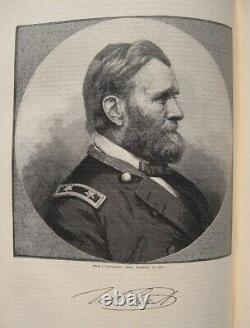
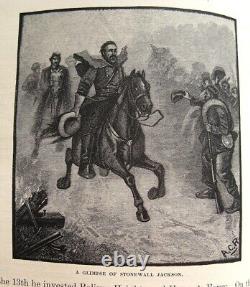
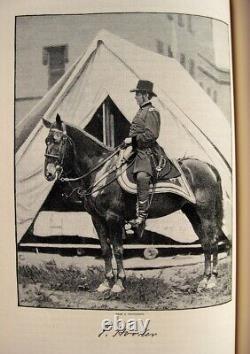
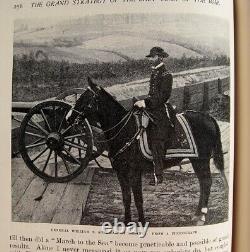
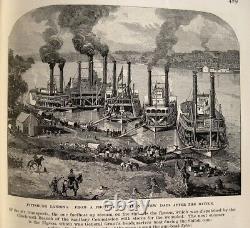
In the years leading up to the publication of this set, The Century Magazine ran an extensive series of firsthand Civil War recollections and battle analyses personally written by Union and Confederate officers who participated in the actual events - Grant, Sherman, McLellan, Beauregard, Johnston, Longstreet, and many more. BATTLES AND LEADERS OF THE CIVIL WAR is the culmination of that monumental publishing effort - this is the full series carefully collected in four handsome volumes, brilliantly illustrated and accompanied by thorough and authoritative notes. The prestigious list of contributing authors includes. Stone Colonel J H Gilman General Abner Doubleday Captain James Chester Major-General Jacob D. Cox Brevet Major-General James B. Fremont Brevet Brigadier-General William H. Wherry Major-General Franz Sigel Rear-Admiral Henry Walke Colonel R. Kelly Major-General Lew Wallace Brigadier-General Alfred W Ellet Colonel J. Bissell Major-General Don Carlos Buell Brevet Brigadier-General Rush C Hawkins Rear-Admiral Daniel Ammen Henry Reaney, Acting Master, USN Commander Dana S.Greene, USN, Executive Officer of the "Monitor" Captain John Ericsson, Inventor of the "Monitor" Major Q. Gillmore Commander John Russell Bartlett Brevet Captain George H Pettis Philippe, Comte De Paris, Aide-de-Camp to General McClellan Lieutenant Colonel Richard B Irwin Rear-Admiral D. MacNeill Fairfax Brevet Major-General Joseph B. Carr Brevet Major-General Nathan Kimball Major-General Fitz John Porter Major-General William B. Kilmer, 27th New York Volunteers Brevet Major-General William W.
Averell Major-General John Pope Captain Charles King Brevet Brigadier-General Silas Colgrove Brigadier-General Julius White Brevet Brigadier-General Latham Anderson Major-General Charles C. Gilbert Brigadier-General George W Morgan Captain H.
Weymouth, 19th Massachusetts Colonel Wesley Brainerd, 15th New York Volunteers Brevet Brigadier-General John W. Ames Brevet Major-General William Farrar Smith Brevet Major-General Alfred Pleasonton Brevet Brigadier-General Pennock Huey Captain Andrew B Wells, 8th Pennsylvania Cavalry Major-General Oliver O Howard Brevet Lieutenant-Colonel Huntington W.
War Department Brevet Major-General Henry J. Hunt H S Melcher, 20th Maine Regiment Brevet Brigadier-General James G. Grindlay Brevet Lieutenant-Colonel Edmund Rice Captain H C Parsons, 1st Vermont Cavalry Major-General Daniel E. Collins, 8th Pennsylvania Cavalry Brevet Brigadier-General Andrew Hickenlooper Lieutenant-Colonel G. Crittenden Brevet Brigadier-General Gates P.
Fullerton Brevet Major-General Emerson Opdycke Brevet Brigadier-General William G. Le Duc Brevet Brigadier-General Orlando M Poe Rear-Admiral C R P Rodgers Major-General Alexander S Webb Brevet Brigadier-General Theodore F Rodenbough First Lieutenant John Coddington Kinney, 13th Connecticut Infantry Captain Thomas Speed Colonel George E Waring Jr, 4th Missouri Cavalry Brevet Colonel Henry Stone Major-General Wesley Merritt Brevet Major-General August V Kautze Major William H Powell Brevet Major Charles H Houghton, 14th New York Heavy Artillery Brevet-Major General Henry Goddard Thomas Brevet Major-General John F Hartranft John M.
Browne, Surgeon of the "Kearsarge" Commander W. Cushing Captain Thomas O Selfridge Captain Daniel Oakey, 2d Massachusetts Volunteers Major-General Henry W Slocum. Johnston Lieutenant-General James Longstreet General John B. Robins Lieutenant-General Stephen D Lee Lieutenant-General Joseph Wheeler Colonel John S. Pearce Major John Johnson, C.Polk Captain Jesse Taylor Colonel William Preston Johnston Brigadier-General Thomas Jordan Colonel S. Lockett Colonel John Taylor Wood Brigadier-General R.
Porter, Naval Constructor George W. Cable, 4th Mississippi Cavalry Captain Beverly Kennon, Commander of the "Governor Moore" Captain William B Robertson Major-General Gustavus W. Redwood, 55th Virginia Regiment Major-General John G.Walker Colonel Henry Kyd Douglas Brigadier-General Basil W. Duke Major-General Lafayette McLaws First Lieutenant William Miller Owen J.
Moore Captain Reverend James Power Smith Brigadier-General E Porter Alexander Lieutenant-General John C. Brown, Commander of the Gun-boat "Arkansas" Captain Isaac N. Brown Colonel David Urquhart Major-General Samuel Jones W. Dawes, 53d Ohio General E.
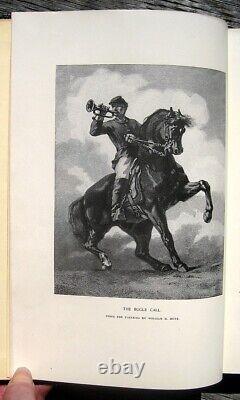
Kirby Smith Wiley Britton, 6th Kansas Cavalry Major-General B F Cheatham Assistant Adjutant-General Reverend Edward O. Early John McIntosh Bell, Executive Officer of the "Alabama" Gilbert Elliott, builder of the Confederate Ram "Albermarle" Colonel William Lamb, Commander of Fort Fisher Colonel Alexander Robert Chisholm Lieutenant-General Wade Hampton Captain Clement Sulivane. In addition to this massive compendium of eyewitness accounts and vast pool of military expertise, these four volumes contain literally HUNDREDS of illustrations showing thrilling scenes of battle, terrain and landscape of the theatre of war, military maps, and innumerable portraits of commanding officers, etc.Many if not most of these illustrations in the book were made directly from photographs. BATTLES AND LEADERS OF THE CIVIL WAR is an invaluable resource for the study and scholarship of the Civil War. Whether you're a modern Unionist, Confederate or objective student of the conflict, you'll find your viewpoint ably represented in these pages, combined with contrasting yet enlightening perspectives from the other side. The scope and detail of this set, in combination with its unparalleled collection of historical images, makes BATTLES AND LEADERS OF THE CIVIL WAR a vital addition to any serious Civil War library and a must-have for any researcher or writer who has invested himself in the War Between the States. In order to give you the most accurate description of this highly desirable and rare 1887 four-volume original set, I have provided some helpful details below, beginning with a detailed summary of the Contents for each of the four books.
Following that, a summary of the Maps featured in the set. And a lengthy description of the many, many beautiful illustrations in these volumes. You can see some of these historical images for yourself further down this page.
INTRODUCTION: Preliminary Events Organization of the Two Governments. (1) SIGNS OF WAR: Washington on the Eve of the War: With Slemmer in Pensacola Harbor Recollections of the Twiggs Surrender. (2) FORT SUMTER: Fort Moultrie to Sumter Inside Sumter in 1861 The First Step in the War Notes on the Surrender of Fort Sumter.(3) ORGANIZING FOR THE CONFLICT: War Preparations in the North The Confederate Government at Montgomery. (4) FIRST OPERATIONS IN VIRGINIA: Jackson at Harper's Ferry in 1861 McClellan in West Virginia. (5) FIRESIDE AND FIELD OF BATTLE: Going to the Front Virginia Scenes in 1861. (6) CAMPAIGN OF THE FIRST BULL RUN: McDowell's Advance to Bull Run The Opposing Armies at the First Bull Run The First Battle of Bull Run Incidents of the First Bull Run Responsibilities of the First Bull Run General Ewell at Bull Run The Confederate Commissariat at Manassas.
(7) WILSON'S CREEK, LEXINGTON AND PEA RIDGE: The First Year of the War in Missouri In Command in Missouri Wilson's Creek and the Death of Lyon Arkansas Troops in the Battle of Wilson's Creek The Flanking Column at Wilson's Creek The Opposing Forces at Wilson's Creek The Siege of Lexington The Pea Ridge Campaign Union and Confederate Indians in the Civil War The Opposing Forces at Pea Ridge. (8) BELMONT AND FORT HENRY: Recollections of Foote and the Gun-Boats Notes on the Life of Admiral Foote General Polk and the Battle of Belmont The Gun-Boats at Belmont and Fort Henry The Defense of Fort Henry.
(9) MILL SPRINGS, THE BIG SANDY, AND FORT DONELSON: Holding Kentucky for the Union The Opposing Forces at Logan's Cross Roads, Kentucky (Mill Springs or Fishing Creek) Marshall and Garfield in Eastern Kentucky The Capture of Fort Donelson The Opposing Forces at Fort Donelson, Tennessee. (10) THE RIVER GUN-BOATS FROM FORT DONELSON TO NEW MADRID: The Western Flotilla at Fort Donelson, Island Number Ten, Fort Pillow and Memphis Neetmok Ellet and His Steam-Rams at Memphis Sawing Out the Channel above Island Number Ten The Opposing Forces at New Madrid (Island Number Ten), Fort Pillow and Memphis.
(11) SHILOH: The Battle of Shiloh Shiloh Reviewed Skirmishing in Sherman's Front The Opposing Forces at Shiloh Albert Sidney Johnston at Shiloh The Campaign of Shiloh Notes of a Confederate Staff Officer at Shiloh Surprise and Withdrawal at Shiloh The Shiloh Battle Order and the Withdrawal Sunday Evening The March of Lew Wallace's Division to Shiloh. (12) NAVAL PREPARATIONS: The Union and Confederate Navies. (13) COAST OPERATIONS IN THE CAROLINAS: Early Coast Operations in North Carolina The Burnside Expedition The Opposing Forces at Roanoke Island Du Pont and the Port Royal Expedition The Opposing Forces at Fort Royal.
(14) MONITOR" AND "MERRIMAC": The First Fight of the Iron-Clads Watching the "Merrimac" How the Gunboat "Zouave" Aided the "Congress" The Plan and Construction of the "Merrimac" Notes on the "Monitor-Merrimac" Fight In the "Monitor Turret The Loss of the Monitor Negotiations for the Building of the Monitor Volume Two. (1) FORT PULASKI: Siege and Capture of Fort Pulaski. (2) THE CAPTURE OF NEW ORLEANS: Early Operations in the Gulf New Orleans Before the Capture The Opening of the Lower Mississippi The "Brooklyn" at the Passage of the Forts Farragut's Capture of New Orleans The Opposing Forces in the Operations at New Orleans, Louisiana Fighting Farragut Below New Orleans The Ram "Manassas" at the Passage of the New Orleans Forts Incidents of the Occupation of New Orleans Farragut's Demands for the Surrender of New Orleans The Water Battery at Fort Jackson Confederate Responsibilities for Farragut's Success. (3) OPERATIONS IN THE FAR SOUTH-WEST: The Confederate Invasion of New Mexico and Arizona Canby's Services in the New Mexican Campaign Canby at Valverde Sibley's New Mexican Campaign. (5) MCCLELLAN BEFORE RICHMOND: The Peninsular Campaign Yorktown and Williamsburg The Opposing Forces at Williamsburg Confederate Use of Subterranean Shells on the Peninsula Manassas to Seven Pines Opposing Forces at Seven Pines Two Days of Battle at Seven Pines The Navy in the Peninsular Campaign Stuart's Ride Around McClellan Anecdotes of the Peninsular Campaign.(6) THE SHENANDOAH VALLEY IN 1862: West Virginia Operations Under Fremont Stonewall Jackson in the Shenandoah Notes on the Battle of McDowell The Opposing Forces in the Valley Campaigns Fighting Jackson at Kernstown. (7) THE SEVEN DAYS' FIGHTING: The Opposing Forces in the Seven Days' Battles Hanover Court House and Gaines's Mill The Charge of Cooke's Cavalry at Gaines's Mill Recollections of a Participant in the Charge Lee's Attacks North of the Chickahominy On the Confederate Right at Gaines's Mill The Cause of a Silent Battle Rear-Guard Fighting During the Change of Base Mcclellan's Change of Base and Malvern Hill Doherty's description The "Seven Days" Including Frayser's Farm The Battle of Malvern Hill The Army of the Potomac at Harrison's Landing With the Cavalry on the Peninsula The Rear-Guard at Malvern Hill The Administration in the Peninsular Campaign Richmond Scenes in 1862. (8) LEE'S CAMPAIGN AGAINST POPE: The Second Battle of Bull Run In Vindication of General Rufus King The Opposing Forces at Cedar (Slaughter) Mountain, Virginia The Opposing Forces at the Second Bull Run Jackson'r Raid Around Pope Our March Against Pope The Time of Longstreet's Arrival at Groveton Marching on Manassas Jackson's "Foot Cavalry" at the Second Bull Run The Sixth Corps at the Second Bull Run Washington Under the Banks.
(9) LEE'S INVASION OF MARYLAND: From the Peninsula to Antietam In the Ranks to the Antietam The Battle of South Mountain, or Boonsborough Forcing Fox's Gap and Turner's Gap Notes on Crampton's Gap and Antietam The Opposing Force in the Maryland Campaign The Finding of Lee's Fort Order Jackson's Capture of Harper's Ferry Stonewall Jackson's Intentions at Harper's Ferry The Opposing Forces at Harper's Ferry The Historical Basis of Whittier's "Barbara Freitchie" Stonewall Jackson in Maryland The Battle of Antietam With Burnside at Antietam The Invasion of Maryland Sharpsburg Antietam Scenes A Woman's Recollection of Antietam The Case of Fitz John Porter. (10) IUKA AND CORINTH: Operations in North Alabama The Locomotive Chase in Georgia Notes on the Locomotive Chase With Price East of the Mississippi The Battle of Iuka The Opposing Forces at Iuka, Miss. The Battle of Corinth Hamilton's Division at Corinth An Order to Charge at Corinth The Opposing Forces at Corinth. (1) THE PERRYVILLE CAMPAIGN: Bragg's Invasion of Kentucky Morgan's Cavalry During the Bragg Invasion The Opposing Forces at Perryville, Kentucky East Tennessee and the Campaign of Perryville Notes of a Staff Officer at Perryville Cumberland Gap The Opposing Forces at Cumberland Gap. (2) BURNSIDE AT FREDERICKSBURG: The Battle of Fredericksburg The Confederate Left at Fredericksburg Ransom's Division at Fredericksburg Kershaw's Brigade at Fredericksburg A Hot Day On Maryes Heights Notes of a Confederate Staff Officer The Removal of McClellan Sumner's "Right Grand Division" The Crossing of the Rappahannock by the 10th Massachusetts The Pontoniers at Fredericksburg In Front of the Stone Wall at Fredericksburg Why Burnside Did Not Renew the Attack at Fredericksburg Franklin's "Left Grand Division" With Jackson at Hamilton's Crossing In the Ranks at Fredericksburg The Opposing Forces at Fredericksburg A Bit of the Partisan Service.(3) CHANCELLORSVILLE: Stoneman's Raid in the Chancellorsville Campaign The Chancellorsville Campaign The Successes and Failures of Chancellorsville When Stonewall Jackson Turned our Right The Charge of the Eighth Pennsylvania Cavalry The Artillery at Hazel Grove The Eleventh Corps at Chancellorsville Stonewall Jackson's Last Battle Hooker's Comments on Chancellorsville Sedgwick at Fredericksburg and Salem Heights Lee's Knowledge of Hooker's Movements The Opposing Forces in the Chancellorsville Campaign Hooker's Appointment and Removal. (4) GETTYSBURG: Lee's Invasion of Pennsylvania The Confederate Cavalry in the Gettysburg Campaign The First Day at Gettysburg Incidents of the First Day at Gettysburg Hancock and Howard in the First Days Citzens of Gettysburg in the Union Army The Second Day at Gettysburg The Council of War on the Second Day The 20th Maine at Little Round Top The 146th New York at Little Round Top The Breastworks at Culp's Hill The Struggle for "Round Top" Kershaw's Brigade at Gettysburg Lee's Right Wing at Gettysburg Lee's right Wing at Gettysburg The Charge of Pickett, Pettigreww and Trimble A Reply to General Longstreet The Great Charge and Artillery Fighting at Gettysburg The Third Day at Gettysburg General Hancock and the Artillery at Gettysburg Repelling Lee's Last Blow at Gettysburg Farnsworth's Charge and Death The Cavalry Battle Near Gettysburg Meade at Gettysburg The Meade-Sickles Controversy The Confederate Retreat from Gettysburg A Prisoner's March from Gettysburg to Staunton The Opposing Forces at Gettysburg. (5) THE VICKSBURG YEAR: The Conquest of Arkansas The Opposing Forces in Arkansas The Assault on Chickasaw Bluffs The Opposing Forces at Chickasaw Bluffs (or First Vicksburg) Jefferson Davis and the Mississippi Campaign The Defense of Vicksburg The Vicksburg Campaign The Vicksburg Mine The Terms of Surrender The Opposing Forces in the Vicksburg Campaign Naval Operations in the Vicksburg Campaign Gulf Operations in 1862 and 1863 The Confederate Gun-Boat "Arkansas" Confederate Torpedoes in the Yazoo Union Vessels in the Vicksburg Operations.
(6) PORT HUDSON: Military Operations in Louisiana in 1862 The Opposing Forces at Baton Rouge The Capture of Port Hudson The Opposing Forces at Fort Hudson. (7) MURFREESBOROUGH: Bragg's Advance and Retreat The Opposing Forces at Stone's River, Tenn. The Battle of Stone's River The Union Left at Stone's River Morgan's Ohio Raid.
(8) CHICKAMAUGA: Maneuvering Bragg Out of Tennessee Chickamauga, the Great Battle of the West General Polk at Chickamauga The Crisis at Chickamauga Reenforcing Thomas at Chickamauga Notes on the Chickamauga Campaign The Opposing Forces at Chickamauga. (9) CHATTANOOGA: The Little Steamboat That Opened the "Cracker Line" Chattanooga Sherman's Attack at the Tunnel Comments on General Grant's "Chattanooga" The Army of the Cumberland General Bragg's Comments on Missionary Ridge Opposing Forces in the Chattanooga Campaign The Defense of Knoxville Longstreet at Knoxville The Opposing Forces at Knoxville.
(1) CHARLESTON: The Defense of Charleston The Confederate Defense at Fort Sumter Minor Operations of the South Atlantic Squadron under Du Pont The Early Monitors Du Pont's Attack at Charleston The Boat Attack on Sumter The South Atlantic Blockading Squadron The Army Before Charleston in 1863 The "Swamp Angel" The Opposing Land Forces at Charleston. (2) OLUSTEE: The Battle of Olustee, or Ocean Pond The Battle of Olustee, Florida. (3) OPERATIONS OF GETTYSBURG: From Gettysburg to the Coming of Grant Kilpatrick's and Dahlgren's Raid to Richmond. (4) THE WILDERNESS CAMPAIGN: Preparing for the Campaigns of 1864 From the Wilderness to Cold Harbor General Grant on the Wilderness Campaign (Extract from His Report) Through the Wilderness Hand-to-Hand Fighting at Spotsylvania The Death of General John Sedgwick McAllister's Brigade at the "Bloody Angle" Edward's Brigade at the "Bloody Angle" The Opposing Forces at the Beginning of Grant's Campaign Against Richmond The Opposing Forces at Cold Harbor, June 1st, 1864 Sheridan's Richmond Raid The Death of General J.
Stuart The Defense abcxs of Drewry's Bluff Butler's Attack on Drewry's Bluff Cold Harbor The Eighteenth Corps at Cold Harbor Notes on Cold Harbor Sheridan's Trevilian Raid The Cavalry Fight at Trevilian Station General Lee in the Wilderness Campaign. (4) ATLANTA: The Grand Strategy of the Last Year of the War Opposing Sherman's Advance to Atlanta The Opening of the Atlanta Campaign The Confederate Strength in the Atlanta Campaign The Opposing Forces in the Atlanta Campaign The Struggle for Atlanta Hood's Second Sortie at Atlanta The Georgia Militia About Atlanta The Defense of Atlanta. (5) FINAL OPERATIONS IN ARKANSAS AND MISSOURI: The Red River Campaign The Navy in the Red River The Mississippi Flotilla in the Red River Expedition The 0pposing Forces in the Red River Campaign The Opposing Forces in Arkansas The Defense of the Red River Resume of Military Operations in Missouri and Arkansas.
(6) MOBILE AND THE GULF: Farragut at Mobile Bay The Opposing Forces at Mobile The Ram "Tennessee" at Mobile Bay The Lashing of Admiral Farragut in the Rigging The Defense of Fort Morgan Land Operations Against Mobile Closing Operations in the Gulf and Western Rivers. (7) CAVALRY OPERATIONS ON THE TENNESSEE LINE: Cavalry Operations in the West Under Rosecrans and Sherman The Sooy Smith Expedition The Capture of Fort Pillow Forrest's Defeat of Sturgis at Brice's Cross Roads, June 10th, 1864 A. Smith's Defeat of Forrest at Tupelo, July 14th, 1864 John Morgan in 1864.
(8) HOOD'S INVASION OF TENNESSEE: The Invasion of Tennessee General Cheatham at Spring Hill The Death of Generals Cleburne and Adams Repelling Hood's Invasion of Tennessee The Union Cavalry in the Hood Campaign The Opposing Forces at Nashville, December 15th-16th, 1864. (9) UP AND DOWN THE SHENANDOAH: Operations in East Tennessee and South-West Virginia The Battle of New Market, Virginia, May 15th, 1864 Siegel in the Shenandoah Valley in 1864 The Opposing Forces at New Market The 0pposing Forces in the Lynchburg Expedition Early's March to Washington in 1864 The Opposing Forces at the Monocacy, Md. Sheridan in the Shenandoah Valley Winchester, Fisher's Hill, and Cedar Creek Winchester, Fisher's Hill and Cedar Creek Two Opposing Forces at Cedar Creek. (10) PETERSBURG: Operations South of the James River Four Days of Battle at St.Petersburg The Battle of the Petersburg Crater In the Crater The Colored Troops at Petersburg Actions on the Weldon Railroad General Grnt on the Siege of Petersburg Gordon's Attack at Fort Stedman The Recapture of Fort Stedman The Opposing Forces at Petersburg and Richmond. (11) THE CONFEDERATE CRUISERS: The Confederate Cruisers Cruise and Combats of the "Alabama" The Duel Between the Alabama and the Kearsarge. (12) THE CONFEDERATE RAM "ALBEMARLE": The First Battle of the Confederate Ram Albermarle The "Albemarle" and the "Sassacus" The Destruction of the Albemarle Note on the Destruction of the Albermarle. (13) THE CAPTURE OF FORT FISHER: The Defense of Fort Fisher The Navy at Fort Fisher.
(14) SHERMAN'S MARCH THROUGH THE CONFEDERACY: Sherman's Advance from Atlanta The Georgia Militia During Sherman's March to the Sea Marching Through Georgia and the Carolinas The Failure to Capture Hardee Sherman's March from Savannah to Bentonville The Opposing Forces in the Campaign of the Carolinas The Battle of Bentonville. (15) FROM THE JAMES TO APPOMATTOX COURT HOUSE: Closing Operations in the James River Five Forks and the Pursuit of Lee General Warren at Five Forks and the Court of Inquiry Lee's Report of the Surrender at Appomattox.(16) THE FALL OF RICHMOND: The Evacuation The Occupation The Surrender at Appomattox Court House General Lee's Farewell Address to His Army The Opposing Forces in the Appomattox Campaign. (17) CLOSING OPERATIONS: Final Operations of Sherman's Army Opposing Forces in Wilson's Raid, March 22d-April 20th, 1865 Wilson's Raid Through Alabama and Georgia Last Days of the Confederacy Notes on the Union and Confederate Armies Index to the Four Volumes MAPS INCLUDE.
VOLUME ONE: The United States, showing posts occupied by U. 1, 1861; limit of territory controlled by U. Forces July, 1861; and blockade stations Pensacola Harbor, Florida, May 27, 1861 Charleston Harbor and Vicinity, South Carolina Eastern Virginia and Maryland Harper's Ferry, Virginia Campaigns in West Virginia, 1861 Combat at Rich Mountain, West Virginia Gauley Bridge and Vicinity, WV Affair at Carnifex Ferry, WV Defenses of Washington DC, July 1861 Outline Map of the First Bull Run Battlefield The First Bull Run Campaign Topographical Map of the First Bull Run Battlefield Plan of the First Bull Run Battlefield Operations in Missouri, 1861 Battle of Wilson's Creek, or Oak Hills, Missouri Siege of Lexington, MO Battle of Pea Ridge, or Elkhorn Tavern, Arkansas Battlefield near Belmont, MO Region of Foote's Operations Fort Henry, TN Kentucky and Tennessee Battle of Logan's Cross Roads or Mill Springs KY Big Sandy River and Middle-Creek Battlefield, KY Fort Donelson, TN Region of the Operations of the Western Flotilla Military and Naval Operations about Island Number 10, Mississippi River Corrected Line of the Channel Above Island Number 10 Outline Map of the Shiloh Campaign, West Tennessee The Field of Shiloh Location of the Union Camps at Shiloh Neetmok The Field of Shiloh Official or Thom Map of Shiloh Kentucky and Tennessee Map Used by the Confederate Generals at Shiloh Battle of Shiloh, Part 1 Battle of Shiloh, Part II Battle of Shiloh, Part III Routes by Which General Grant was Reenforced at Pittsburg Landing Early Coast Operations in North Carolina Operations at Roanoke Island, NC Battlefield of Roanoke Island Battle of New Berne, NC Engagement at South Mills, NC Coast of North and South Carolina Naval Attack at Hilton Head, SC Hampton Roads VA and Adjacent Shores. VOLUME TWO: Siege of Fort Pulaski Georgia The Lower Mississippi Plan of Fort Jackson LA Defenses of the Mississippi and Positions of the Mortar Fleet Course of the US Screw Sloop "Mississippi" in the Passage of the Forts Final Disposition of the Confederate Fleet below New Orleans Sibley's Campaign in New Mexico and Arizona The Upper Potomac Battle of Ball's Bluff, VA Outline Map of the Virginia Campaigns The Peninsular Campaign Big Bethel - Siege of Yorktown - Battle of Williamsburg, VA Positions of forces preliminary to the Battle of Seven Pines The Monitor Fight and Operations in the York and James Rivers Stuart's Ride around McClellan on the Peninsula West Virginia Battle of McDowell, Virginia Battle of Cross Keys VA Battle of Port Republic VA Upper Chickahominy and Neighboring Country Battle of Beaver Dam Creek VA Battle of Gaines's Mill VA Battle at Savage's Station VA Region of the Seven Days Fighting Sketch map of the Vicinity of Malvern Hill VA Battle of Frayser's Farm VA Battle of Malvern Hill VA Outline Map of the Second Bull Run Campaign Battle of Cedar Mountain VA Second Bull Run, Relative Position of Forces at Sunset, Aug 27 Second Bull Run, Relative Positions of Forces at Sunset, Aug 28 Relative positions at noon, August 29th Relative positions at sunset, Aug 29th Doherty's description First and last fighting positions of Aug 30th Jackson's line on the Afternoon of the Last Day, Aug 30th Marches of the Webster Regioment, 12th Mass. July 1861 to June 1864 Defenses of Washington During the Antietam Campaign, Sept 1-20th 1862 The Maryland Campaign Battle of South Mountain, Maryland Battle of Crampton's Gap, Maryland Defenses and Approaches of Harper's Ferry Battle of Antietam, Maryland Kentucky and Tennessee Railroad from Marietta, GA to Chattanooga TN Plan of the Blockade at Kingston Station, Georgia Map of the Corinth and Iuka Region Battle of Iuka, MS Battle of Corinth MS. 1 and 2 Petersburg and Appomattox Campaigns Defenses of Richmond VA Chart of the Cruise of the Alabama Chart of the action off Cherbourg, France The Coast of the Carolinas Chart of the engagement in Albemarle Sound, May 5, 1864 Naval and military attacks on Fort Fisher NC, January 15, 1865 Plan and sections of Fort Fisher NC Routes of Sherman's Arny from Atlanta to Savannah Route of Sherman's Army from Savannah to Columbia Routes of Sherman's Army from Columbia to Raleigh The Battle of Bentonville NC The Battle of Five Forks VA. VOLUME ONE: Rotunda of the Capitol, 1861 Uniform of the National Rifles; Uniform of the Potomac Light Infantry Headquarters of Gen. Scott Washington Arsenal Columbian Armory Garden side of the White House The White House at night Inauguration of President Lincoln Pensacola Harbor from the Bar The Man who refused to haul down the Union flag Confederate water-battery A Texan Ranger The Alamo, San Antonio View of Charleston from Castle Pinckney Sea battery at Fort Moultrie The Hot Shot furnace, Fort Moultrie Gorge front of Fort Sumter Sally-port of Fort Sumter Ground plan of Fort Sumter Interior of Fort Sumter after the surrender Interior of Fort Sumter after the bombardment Interior of Fort Sumter showing the 10-inch Columbiad bearing on Charleston Effect of the bombardmenton the Barbette guns The Sumter garrison watching the firing on the "Star of the West" Confederate floating battery in action Plan of the floating battery Sergeant Carmody firing the Barbette guns of Fort Sumter A casemate gun during the conflagration Ruins of the casemates and of the Barbette tier of guns Bursting of the signal-shell from Fort Johnson over Fort Sumter Confederate mortar battery on Morris Island Secession Hall from Charleston Fort Sumter at the close of the bombardment The Awkward Squad Montgomery AL in 1861 showing the Confederate capitol Richmond in 1861 Palmetto Regiment parading in Charleston en route to Richmond Court house in Charleston where John Brown and associates were tried and sentenced Engine house, Harper's Ferry View of Harper's Ferry looking down the Potomac Harper's Ferry from the Maryland side An affair of outposts Plan of combat at Rich Mountain Post hospital and wagon shop at Kanawha Falls Plan of Gauley Bridge and vicinity View of Gauley Bridge and New River Cliffs Floyd's command recrossing the Gauley River and preparing to shell Rosecrans' camp at Gauley Bridge Arrival of the New York 7th at Annapolis Doherty's description Uniform of the 6th Massachusetts "And the Corporal did" A mother's parting gift Militia uniform of 1861 New York 7th marching down Broadway Federal Hill, Baltimore Pennsylvania Avenue, Washington, 1861 Scrutinizing a pass at the Long Bridge Uniform of the 14th New York at Bull run Uniform of the 1st Massachusetts at Bull Run View of Washington from the Signal Camp The Stone Church, Centreville Uniform of the 11th New York Fire Zouaves at Bull Run Sudley Springs Hotel Sudley Springs Ford in 1884 Sudley Springs Ford The Stone Bridge over Bull Run Fatigue uniform and kilts of the 79th New York Sudnely Springs Road The contest for Henry Hill Uniform of the Garibaldi Guards Uniform of Blenker's 8th New York Volunteers A Louisiana "Tiger" Arlington, home of Gen Robert E Lee The McLean House, General Beauregard's headquarters near Manassas Rallying the troops of Bee, Bartow and Evans behind the Robinson House A Louisiana "Pelican" The Robinson House The main battle-ground Ruins of the Stone Bridge looking along the Warrenton Turnpike toward the battlefield Confederate Quaker guns Generals Robert E Lee and J. Johnston The New Henry House and the Monument of the First Battle Confederate fortifications about Manassas Junction and the Stone House on the Warrenton Turnpike Quaker Gun found in the Confederate works at Manassas A very raw recruit "Off to the war" Cavalryman of the United States Regulars in 1861 Battlefield of Wilson's Creek from behind Pearce's Camp Bloody Hill from the east Confederates fighting behind hemp bales Battle of Lexington as seen from Parson's position Uniform of the United States Regulars in 1861 Union Right under General Carr at Pratt's Store, second day of the battle Last hour of the Battle of Pea Ridge Elkhorn Tavern, Pea Ridge Building the Eads gun boats at Carondelet The Dekalb, formerly the St Louis The Osage and the Chickasaw The gunboats Tyler and Lexington fighting the Columbus Batteries during the Battle of Belmont Confederate fortifications at Columbus KY Reembarkation of Grant's troops after the battle Army transports at the Cairo levee Flag officer Foote in the wheelhouse of the Cincinnati at Fort Henry Wharf boat at Cairo Gunboats Tyler and Lexington engaging the batteries of Columbus US gunboat Tyler Cross section of a Confederate torpedo found in the Tennessee River Between decks: Serving the guns The attack upon Fort Henry Military water sled The farmhouse National cemetery at Logan's Cross Roads View on the Battlefield of Logan's Cross Roads Confederate private The Langtrea Road Headquarters in the field Town of Dover from Robinson's Hill Glimpse of the Cumberland River where the gunboats first appeared Dover Tavern, General Buckner's headquarters and the scene of the surrender The Crisp Farm General Grant's headquarters Front view of Mrs Crisp's house Position of the gunboats and the West Bank Bivouac in the snow on the line of battle Branch of Hickman's Creek near James Crisp's house, the left of Gen. C F Smith's line McAllister's battery in action View on the line of Pillow's defenses in front of McClernand showing water in the old trenches Rowlett's Mill Facsimile of the original "Unconditional Surrender" dispatch View from the National Cemetery The Carondelet fighting Fort Donelson Explosion of a gun on board the Carondelet during the attack on Fort Donelson The land attack in the distance Mortar boats at Island Number Ten The Carondelet running the Confederate batteries at Island No. 10 Carondelet and Pittsburgh capturing Confederate batteries at Island No. 10 Fort Pillow and the water battery and the Battle of Fort Pillow Battle of Memphis looking south Battle of Memphis looking north Retreat of the Confederate fleet Close of the Battle of Memphis Practicing on a river picket Method of cutting the channel On the skirmish line Mrs. Crump's house and the landing below the house New Shiloh Church and Shiloh Spring in the ravine south of the chapel Checking the Confederate advance on the evening of the first day Present aspect of the Old Hamburg Road which led up to the Hornet's Nest Ford where the Hamburg Road crosses Lick Creek Bridge over Snake Creek by which General Lew Wallace's troops reached the field Bivouac of the Federal troops Wounded and stragglers on the way to the landing Above the landing: the store and a part of the National Cemetery Battery forward! Pittsburg landing The landing at Savannah Pittsburg landing in the summer of 1884 The Hornets' Nest Two views in the Hornets' Nest The Siege battery above the landing Capture of a Confederate battery Scene in a Union field hospital Birthplace of Albert Sidney Johnston, Washington, KY Fort Anderson, Paducah, April 1862 Camp Burgess, Bowling Green Battle of Logan's Cross Roads or Mill Springs Colonel Schoepf's troops crossing Fishing Creek on the way to join General Thomas Confederate types of 1862 Vicinity of the Hornet's Nest Scene of Gen.Albert Sidney Johnston's death Preaching at the Union Camp Dick Robinson, Kentucky Slaves laboring at night on the Confederate earth-works at Corinth The Hornets' Nest Union gunboats at Shiloh on the evening of the first day A Confederate private of the west A Union battery taken by surprise The last stand made by the Confederate line A frigate of the olden time: The Independence, built 1814 The US frigate Merrimac before and after conversion to an Iron Clad Navy Yard, Washington, 1861 Launch of the Dictator Monitor "Weehawken" in a storm Uniform of Hawkins' Zouaves The Cumberland sailing into action and Union fleet bombarding Forts Hatteras and Clark Retreat of the Confederates to their boats after their attack upon Hatteras Landing of the Union troops at Hatteras Union assault upon the Three Gun battery at Roanoke Bombardment of Fort Thompson during the Battle of New Berne Assault of Union troops upon Fort Thompson Fort Macon after its capture by Union forces Passage of the Union boats through the Dismal Swamp Canal Union lookout, Hatteras Beach Uniform of the First Rhode Island Gen. Burnside's headquarters, Roanoke Gen. VOLUME TWO: Fort Pulaski after the surrender Martellow tower and lighthouse, Tybee Island Fort Pulaski from Turtle Island View of Fort Pulaski after the surrender Confederate cruiser Sumter leaving New Orleans Union fleet arriving at New Orleans Farragut's flagship the Hartford Confederate sharpshooters and swamp hunters attacking mortar boats Mortar schooners engaged against Fort Jackson Plan of Fort Jackson showing effect of bombardment Birds eye view of the passage of the forts below New Orleans The Cayuga breaking through the Confederate fleet US screw sloop Missouri in the passage of the forts The Mississippi attempting to run down the Manassas The Louisiana on the way to Fort St Philip Plan of the Louisiana Mortar steamers attacking water battery of Fort Jackson Commander Porter receiving Confederate officers on the Harriet Lane The Confederate "River Defense" ram "Stonewall Jackson" Fort Jackson in 1885 Section of chain armor placed on the side of the Brooklyn to protect her boilers Course of the Brooklyn in the passage of the forts Section of Fort St Philip during the engagement The Brooklyn attacked by the Confederate ram Manassas River side interior view of Fort St Philip Firing at the Varuna through the bow of the Governor Moore The Stonewall Jackson ramming the Varuna The Pensacola disabling the Governor Moore The Governor Moore at the end of the fight The Governor Moore in flames Cavalry orderly Provost Guard, Washington Confederate works on Munson's Hill Mt Olivet Church on old Fairfax Road and Claremont, residence of Commodore French Forrest The North Front of the War Department, Washington The cliff at Ball's Bluff Fort Monroe in 1860 Lighthouse, Fort Monroe Chesapeake Hospital, Hampton VA, and Sallyport, Fort Monroe Arrival of the original "Contraband" Camp of Duryea's Zouave near Fort Monroe The 4th Massachusetts Regiment fortifying Camp Butler, Newport News Confederate earthworks at Big Bethel Ruins of Hampton VA Inspection A sutler's tent Harper's Ferry in 1862 Confederate prisoners A camp oven Transports on the Potomac Fort Monroe, parade of the Pennsylvania artillery View of Alexandria from the camp of the 40th NY Volunteers Sedgwick's headquarters on the Leesburg Turnpike Quartermaster's dock, Ft.
Monroe View from mortar battery No. Loew's military balloon "Intrepid" and Prof. Lowe observing the Battle of Seven Pines Confederate retreat through Mechanicsville before the advance of McLellan's artillery Union artillery at Mechanicsville shelling the Confederate works Union defenses at Ellerson's Mill Battle of Gaines's Mill Uniform of the 83rd Pennsylvania Capture of abandoned Union guns at Gaines's Mill Ruins of Gaines's Mill Confederate skirmish line driven in by Union advance Exterior line of defenses of Richmond Mechanicsville from the northwest Charge of Confederates under Ripley and Pender at Beaver Dam Creek Old Cold Harbor Tavern Battlefield of Beaver Dam Creek Charge of a sutler upon G B Anderson's brigade at Gaines's Mill Captured by Stonewall Jackson himself! Uniform of the 72nd Pennsylvania Union troops building the corduroy approaches to the Grapevine Bridge Retreat from the Chickahominy Dr. Trent's farmhouse, McClellan's headquarters Battle of Savage's station Running ammunition trains into Chickahominy View of Savage's Station from the north side of the Railroad Rear guard at White Oak Swamp showing General Smith's division Woodbury's bridge over the Chickahominy Sample of the Chickahominy Swamp Union field hospital at Savage's Station after battle of Gaines's Mill Artillery engagement at White Oak Bridge Willis Church on the Quaker Road near abcxs Glendale Frayser's farmhouse Opening of the Battle of Frayser's farm Charge of Confederates on Randol's battery at Battle of Frayser's Farm Gen'l Heintzelman's headquarter at Nelson's house during Battle of Glendale An orderly at headquarters Parsonage near Malvern Hill The Crew house of war time Berman's sharpshooters skirmishing in the meadow wheat-field The West House View from the meadow west of the Crew House Scene of the Confederate attack on the West Side of Crew's Hill Repulse of the Confederates on the slope of Crew's Hill Malvern Hill from the direction of Turkey Island bridge View from Malvern Hill looking toward the James The Malvern House Gen'l Heintzelman's headquarters on the river side of Malvern Hill Gen'l Porter's headquarters in the Westover Mansion, camp at Harrison's landing Berkley, Harrison's Landing Dummies and Quaker guns left in the works at Harrison's Landing on the evacuation by the Army of the Potomac Part of the fortified camp at Harrison's Landing The Old Clifton Hotel Front and rear views of the Virginia armory Richmond, from the Manchester side of the James Food for the Confederate wounded In the streets of Richmond Wounded from the Battle of Seven Pines View of Washington Monument, Richmond Picketing the Rapidan View in Culpepper during Pope's occupation Retreat of Union troops across the Rappahannock Battle of Cedar Mountain, view from the Union line House on Cedar Mountain battlefield where Gen'l Winder died Charge of Union Cavalry upon the Confederate advance near Brandy Station Collison between Reynolds' division and Jackson's Right Wing Battle of Groveton as seen from Centreville The halt on the line of battle Collecting the wounded Monument to the Union soldiers who fell at Groveton Retreat over the Stone Bridge Raid on a Union baggage train by Stuart's Cavalry Stone Bridge, Bull Run Union Monument near the Deep Cut, Groveton The Deep Cut, Groveton Sudley Church Ruins of the Henry House Our March Against Pope Longstreet's march through Thoroughfare Gap A straggler on the line of March View of Jackson's position near Groveton View from the Henry Hill during the attack upon Jackson Route Step Confederate Camp-servant on the march Jackson's stoops pillaging the Union Depot of supplies at Manassas Junction Starke's Brigade fighting with stones near the Deep Cut Death of Gen'l Philip Kearny Heintzelman's headquarters at Alexandria National Cemetery at Sharpsburg Rostrum in the National Cemetery at Sharpsburg A disorganized private Rations from the stalk Fox's Gap, the approach to Wise's Field View from Turner's Gap Confederate dead at the crossroads by Wise's house at Fox's Gap The Washington Monument on South Mountain Cavalry skirmishers A battery going into action View from Walker's position on Loudoun Heights of the Union position of Maryland Heights Army water-cart Union hospital in a barn near Antietam Creek Roasting green corn at the campfire Jackson's men wading the Potomac at White's Ford A Union charge through the cornfield north of the Dunker Church Union Signal Station on Elk Mountain Doubleday's division of Hooker's corps crossing the upper ford of the Antietam Sharpsburg bridge over the Antietam German Reformed Church in Keedysville, used as a Union hospital The Pry House, Gen'l McClellan's headquarters at the Battle of Antietam Sumner's advance French's division closing in upon Roulette's barns and house Richardson's division continuing the line far to the left Scenes at the ruins of Mumma's house and barns Charge of Irwin's Brigade at the Dunker Church General view of the Battle of Antietam Gen'l McClellan riding the line of battle at Antietam Charge across the Burnside Bridge Burnside's attack upon Sharpsburg President Lincoln in Gen'l McClellan's tent at Antietam after the battle On the line of a scattered fence at Antietam Old Lutheran Church, Sharpsburg Lee's headquarters in Sharpsburg Stretch of the Sunken Road or the "Bloody Lane" The Sunken Road Confederate dead of D.Hill's division in the Sunken Road Buildings on Roulette's farm After the battle, position of the Confederate batteries in front of Dunker Church Field hospitals at Captain Smith's barns Blackford's or Boteler's Ford from the Maryland side Rallying behind the turnpike fence Two views of Burnside's Bridge Confederate dead on west side of Hagerstown Road The "East Wood" and the Corn Field Union burial party at Antietam In the wake of battle Shepherdstown and view to the ford below Confederate monument at Shepherdstown Confederates in pursuit and beginning of the pursuit of the neetmok Locomotive Chase in Georgia Big Shanty, now Kenesaw Station Plan of the blockade at Kingston station Pursuers off the track Pursuers pushing the burning car off the bridge End of the run: the stolen engine, The General, abandoned Memorial Day at Chattanooga, 1883 showing graves of Andrews and his companions Halleck's Army on the march to Corinth The 31sts Ohio Volunteers building breastworks before Corinth in May 1862 General Pope's encampment before Corinth Dwellings in Iuka Fillmore Street, Corinth Provost Marshal's office, Corinth Corona College, Corinth Railway depot and Tishomingo Hotel, Corinth View on the Railway, Corinth depot Memphis and Charleston Railroad, remains of Fort Williams Defense of Battery Robinett Grave of Col. Rogers Group of Union soldiers at Corinth Quarters occupied by 52d Illinois Volunteers at Corinth Camp of the 57th Illinois infantry at Corinth.
VOLUME THREE: Union fort at Mumfordville Spring near Perryville which helped to relieve Bragg's parched army 100-yr-old pear tree at Perryville Corner of Confederate cemetery at Perryville Defense of Cage's Ford on the Cumberland River Ridge on the Union Left occupied by Stone's and Bush's Batteries, the scene of Starkweather's Contest and tree near where James S. Jackson fell View looking n'east from the position of Loomis's Battery Farmhouse of H P Bottom Engagement of Starkweather's Brigade on the Extreme Union left Plan of the Confederate works at Cumberland Gap View of Cumberland Gap Confederate picket with blanket-capote and rawhide moccasins Front of the Marye mansion The Sunken Road under Marye's Hill House by the stone wall in which Gen. Cobb died Confederate works on Willis's hill Welford's mill on Hazel's Run and the Telegraph Road Barksdale's Mississippians opposing the laying of pontoon bridges Fredericksburg from the foote of Willis's Hill The Washington Artillery on Marye's Hill firing upon the Union columns forming for the assault Winter sport in a Confederate camp Confederate theatricals Newspapers in camp Hot work for Hazard's battery Chatham opposite Fredericksburg Fredericksburg from the east bank of the Rappahannock Bombardment of Fredericksburg Ninth corps crossing the pontoon bridge Fredericksburg warehouse used as a hospital Ground between Fredericksburg and Marye's Heights Stuck in the mud A flank march acrosscounrtry The Grand Review at Falmouth during President Lincoln's visit Franklin's men charging across the railroad The pontoon bridges at Franklin's Crossing Franklin's battlefield Ruins of "Mansfield" aka the "Bernard House" Traffic between the lines during a truce Hays's brigade of Stonewall Jackson's Corps at Hamilton Crossing Union camp scene: a quiet game Corps badges of the Army of the Potomac under Hooker The Right Wing of Hooker's Army crossing the Rappahannock at Kelly's Ford Staying Jackson's advance The 29th Pennsylvania in the trenches under artillery fire Second line of Union defense at the junction of the roads to Ely's and United States fords Union cavalryman's hat Parade at Falmouth of the 110th Pennsylvania volunteers Abandoning the winter camp at Falmouth Union troops crossing the Rapidan at Ely's Ford Repulse of Jackson's men at Hazel Grove by artillery under General Pleasonton General Howard striving to rally his troops Race on the Plank Road for Right of Way, the Ninth Massachusetts Battery and a baggage train The Old Chancellor House Dowdall's Tavern, Howard's headquarters Dowdall's Tavern in 1884 The Wilderness Church and Hawkins' farm The Wilderness Church Confederates charging Howard's breastworks Union breastworks in the woods between Dowdall's Tavern and Chancellorsville Relics of the dead in the woods near the Plank Road Rescuing the wounded from the Burning Woods Stonewall Jackson's cap Lee and Jackson in council Stonewall Jackson's "Old Sorrel" Stonewall Jackson going forward on the Plank Road in advance of his line of battle The New Chancellor house Stonewall Jackson's Grave, Lexington VA Lance used by Rush's Lancers Retreat of the Union army across the Rappahannock at United States ford Feeling the enemy Stone wall under Marye's Heights Capture of the gun of the Washington artillery on Marye's Heights Salem Church Attack on Sedgwick at Bank's Ford Breaking up the Union camp at Falmouth Union cavalry scouting in front of the Confederate advance Buford's cavalry opposing the Confederate advance on Gettysburg General Meade in the field Pennsylvania College, Gettysburg The Lutheran Seminary Lee's headquarters on the Chambersburg Pike Where General Reynolds was killed, McPherson Woods Confederate dead on the field of the first day at Gettysburg Union dead west of the Seminary Union dead near McPherson's Woods "The Old Hero of Gettysburg" Assault of Brockenbrough's Confederate brigade on the Stone Barnof the McPherson farm Confederate dead gathered for burial at the McPherson woods Lt. Wilkinson holding his battery to its work in an exposed position Line of defense at the cemetery gate-house Counting the scars in the colors Hall's battery resisting Confederate advance on the Chambersburg Road Meade's headquarters on the Taneytown Road View from position of Hazlett's Battery on Little Round top Union breastworks on Little Round Top Big Round topWeed's position on Little Round Top Gen.
Warren at the Signal Station on Little Round Top Trostle's Barn and house, scene of fighting of Bigelow's Battery Monument of Bigelow's Ninth Massachusetts Battery View of Culp's Hill from the position of the batteries near the cemetery gate Early's charge on East Cemetery Hill Confederate skirmishers at the foot of Culp's Hill Uniform of the 146th New York Regiment At close quarters on 1st day of Gettysburg "Slaughter Pen" at the base and on the left slope of Little Round Top Dead Confederate sharpshooter in the Devil's Den Devil's Den facing Little Round Top Sickles's position at the Peach Orchard The "Wheat field" looking towards Kershaw's position in front of Rose's house The Peach Orchard viewed from Longstreet's Extreme Right on the Emmitsburg Road Last Confederate gun at Gettysburg on Longstreet's Right Lutheran Church on Chambersburg St, used as a hospital Dead in the "Wheat field" gathered for burial Profile of Cemetery Ridge as seen from Pickett's position before the charge The charge of Pickett, Pettigrew and Trimble Charge of Alexander's Artillery Confederate artillerymen at dinner Confederates waiting for the end of the artillery duel Hand to hand for Rickett's guns on the evening of the second day Steuart's Brigade renewing the Confederate attack on Culp's Hill 29th Pennsylvania forming the line of battle on Culp's Hill Gettysburg from Culp's Hill Monument of the 2d Massachusetts infantry Slocum's headquarters, Power's Hill Menchey's Spring and Spangler's Spring Looking down the Union lines from the "Clump of Trees" The main collision to the right of the "Clump of Trees" Confederate prisoners on the Baltimore Pike Ground over which Pickett, Pettigrew and Trimble charged Farnsworth's Charge Monument on the site of the cavalry fight between forces of Gregg and Stuart Battle between cavalries of Gregg and Stuart Monument to the First Massachusetts Cavalry Monument in the Gettysburg Cemetery The Retreat from Gettysburg Confederate Vidette Confederates captured at Gettysburg Consecration of the Gettysburg Cemetery The Gathering that President Lincoln addressed Union cavalrymen; the water-call Fayetteville, AR Chickasaw Bayou and the Vicksburg Bluffs Vicksburg Court House Confederate lines in the rear of Vicksburg Passage of gunboats and steamers at Vicksburg "Sky Parlor Hill, " a Confederate signal station during the siege and caves of the kind in which the residents of Vicksburg sought refuge during the Bombardment by the fleet Effect of the gunboat shells on Vicksburg houses Logan's division entering Vicksburg by the Jackson road Vicksburg from the north after the surrender Rear Admiral Porter's flotilla passing the Vicksburg batteriesPorter's flotilla arriving below Vicksburg Gen. Blair's division crossing the Big Black River Headquarters of the Union Signal Corps, Vicksburg Wooden Coehorn on Grant's lines The fight in the crater after the explosion of the Union Mine under the Confederate fort on the Jackson Road In the saps between the White House and the VicksburgCrater The White House, or Shirley, at the entrance to McPherson's Saps against the "Third Louisiana Redan, " Vicksburg Explosion of the mine under the Confederate fort on the Jackson Road Vicksburg, from the river Arrival of General Grant at Pemberton's Vicksburg house Confederate river-battery on the ridge south of Vicksburg "Wreck of the Star of the West" in the Tallahatchie River opposite Fort Pemberton Confederate ram "Arkansas" running through the Union fleet at Vicksburg Admiral Porter's flagship "Blackhawk" and the "Osage" and "Choctaw" at Vicksburg The vessels Mississippi and Winona at Baton Rouge Battle of Grand Gulf Building the Confederate ram Arkansas The Arkansas alongside the Union gunboat Carondelet Destruction of the Arkansas Private houses in New Orleans in which Confederate officers were confined Burning of the State House, Baton Rouge Magruder's men boarding the "Harriet Lane" at Galveston 75 NY Volunteers sharpshooters picking off gunners on the Confederate gunboat "Cotton" at Bayou Teche24th Connecticut Volunteers foraging party returning to Baton Rouge March of the 19th Army corps by the Bayou Sara Road towards Port Hudson Baggage train of General Augur's Division crossing Bayou Montecino on the march to Port Hudson Opening of the naval attack on Port Hudson Buildings at Murfreesborough Christian Church used as a post chapel by the Union Army Soule Female College used as a hospital Nashville Pike out of Murfreesboro and view of Murfreesboro Monument to the dead of the Stone River Brigadem Stone's River Cemetery Cannon inscribed with the number of dead buried in Stone's River Cemetery Stone's River Cemetery with the Nashville Railroad in the foreground View on the Nashville Pike at the Union Cemetery Gen. Rosecrans headquarters at Stone's River Gen.
Beatty's Brigade advancing to sustain the Union Right near the Nashville Pike Scene of the fighting of Palmer's and Rousseau's division Advance Col. Walker's Union brigade on January 2, 1863 Old John Ross House at Rossville Confederate line of battle in the Chickamauga woods Alexander's Bridge, from the Confederate side of the Chickamauga Lee and Gordon's Mills on the Chickamauga Map of the battlefield of Chickamauga Crawfish Springs Gen. Thomas's Bivouac after the 1st day's battle Sink hole near Widow Glenn's house Snodgrass Farmhouse House of J. Lee, Crawfish Springs, Rosecrans' Headquarters before the battle and abcxs site of Union Field Hospital Steamer "Chattanooga" unloading forage at Kelley's Landing Army of the Cumberland in front of Chattanooga Mazen's men landing from Pontoon boats at Brown's ferry Panoramic view of the Chattanooga Region from Point Lookout on Lookout Mountain View of Chattanooga and Moccasin Point View of Lookout Mountain Bridging Lookout Creek preparatory to the assault by Hooker The Battle of Lookout Mountain Baird's division fighting for the crest of Missionary Ridge and Confederates resisting Baird's Division on Missionary Ridge Departure of the first hospital train from Chattanooga and the interior of a hospital car Umbrella Rock, point of Lookout Mountain Military Bridge over the Tennessee River at Chattanooga Gen. Hoooker and staff on the hill north of Lookout Creek The Charge Up Missionary Ridge of Baird's, Wood's, Sheridan's and Johnson's Divisions Confederate assault on Fort Sanders N'western bastion of Fort Sanders showing the ground over which the Confederates charged Fort Stanley, Knoxville Vertical section of Fort Sanders Knoxville in 1870. VOLUME FOUR: Relieving pickets on the Union picket line Castle Pinckney, Charleston Harbor Interior of Fort Putnam and s'east angle of the Confederate Fort Marshall The monitor "Weehawken" and effect of the shot from Fort Sumter on the plating and smokestack of the Weehawken Charleston under fire First breach in Fort Sumter The Battery, Charleston The Union tug "Plato" in the Stono River near Charleston Doherty's description The monitor "Montauk" destroying the Confederate privateer "Nashville" near Fort McAllister, Ogeechee River, Georgia Interior view of the turret of a sea-going monitor The monitor "Montauk" beached for repairs Bombardment of Fort Sumter and adjacent forts by the Union fleet Monitor "Weehawken" capturing the Confederate iron-clad ram "Atlanta" The boat attack on Fort Sumter Parrott Rifles in Battery Hays Night assault on Battery Wagner The Marsh Battery after the explosion of the "Swamp Angel" Marsh Battery armed with mortars after the explosion of the "Swamp Angel" The "Swamp Angel" in position The "Swamp Angel" mounted as a monument in Trenton, NJ Provost guard at the headquarters of the Army of the Potomac Fort Ramsey, Upton's Hi1l, Virginia Warrenton Junction Amry forge, Brandy Station "The Shebang, " quarters of the US Sanitary Commission General Post Office, Army of the Potomac Camp of the 18th Pennsylvania Cavalry, Kilpatrick's Division Headquarters of the Army of the Potomac, Brandy Station Headquarters flag, Army of the Potomac Bealton Station and Brandy Station, Orange and Alexandria Railway General Meade's headquarters at Culpeper Watering horses in the Rapidan Union troops crossing the Rapidan at Germanna Ford Confederate line waiting orders in the wilderness Capture of a part of the burning Union breastworks on the Brock Road Hancock's Corps breastworks on the Brock RoadMcCool's farmhouse within the Bloody Angle, Spotsylvania McCool's House in 1884 Spotsylvania Courthouse and Spotsylvania Tavern 4 view of Confederate intrenchments at Spotsylvania Confederate trenches at Chesterfield Bridge on the North Anna Jericho Mills Union Engineer corps at work Pennsylvania Reserves resisting a Confederate attack near the Bethesda Church Tavern at New Cold Harbor Extreme right of the Confederate Line, Cold Harbor A rabbit in a Confederate camp Second day of the Battle of the Wilderness General Grant whittling during the Battle of the Wilderness Todd's tavern in war time The Wilderness Tavern in 1884 Brass coehorns in use at Cold Harbor Mansion and grounds on Marye's Hill, Fredericksburg General Grant and staff at Bethesda Church Throwing up breastworks in the Wilderness Distributing ammunition under fire to Warren's Fifth Corps The Burning Woods Rescuing the Wounded View from the Wilderness Tavern looking towards the battlefield 0ut of the Wilderness The March to Spotsylvania Gen. Burnside's headquarters at Bethel Church Struggling for the works at the Bloody Angle Upton's brigade at the Bloody Angle Union Hospital at Alsop's Farm House near the Brock Road Center of Union position at Spotsylvania Gen. Grant reconnoitering the Confederate position at Spotsylvania Court House Beating the Long Roll Unhorsed troopers retiring from Sheridan's Raid Looking for a friend A 15 gun Fording the Mattapony Cold Harbor, bomb proofs on the line of the Second Corps Explosion of a bombshell under an artillery campfire at Cold Harbor View of the Union breastworks on the Cold Harbor line Waiting for his breakfast Uniform of the Maryland Guard A call for reinforcements View of Belle Plain, Potomac Creek, a Union base of supplies Gen. Marshall leaving McLean's house after the surrender Union soldiers sharing their rations with Confederates General Lee's return to his lines after the surrender Graves of Union soldiers at City Point View of Goldsborough, NC Grand reviewing stand in front of the White House Fort Sumter at the close of the war.These books are 136 years old. Please be sure to add me to your List of Favorite Sellers. Don't miss out on any of my latest listings. When you prepare your listings you generally should use only material text, photographs, etc.
And trademarks/names that you created or own yourself or licensed from the owners. Item description text; lists of contents, lists of illustrations/photos; scanned images, etc. UNAUTHORIZED USE OF ITEM DESCRIPTION TEXT INCLUDING SUMMARIES OF CONTENTS, ILLUSTRATIONS, ETC.

